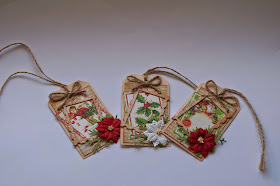
So now where to start? I have used three of these tags and the two little gift cards.
I thought I would share a little tip with you all. The three little tags were a little crinkled from their journey down to me....
....soooo I grabbed my trusty little travel-sized hair straightener
.......and just ironed out the wrinkles. I also use this on some laces and ribbons to get rid of some of those annoying little wrinkles.
Once I had them all straightened I then grabbed my Tim Holtz Tea Dye Distress Ink and make up wedge and inked up the edges. I have also done the same to some chipboard frames.
I added a stamped sentiment to the back of the tag.
Then from the gorgeous embellishments in the kit
I embellished the little frames with some little tag cut outs from the "Long Winters Nap" and "Up on the Housetops" sheets from the 8x8 paper pad. I topped each fo the tags off with a small jute bow and added some pine branches to the poinsettas
The two itty bitty gift cards are only 3"x3" square and were great to use up some of the leftover paper scraps I had.
From the "Ho Ho Ho" sheet I fussy cut the two "Ho Ho Ho" word strips
I fussy cut the Santa from one of the postcards found on the "Up On The Housetops" sheet and added a red rose from my stash with some of the twine and sequins from the kit.
The second little gift card is much simpler as I have just layered different selections from my scraps and fussy cut the image from the "Jolly Old Elf" sheet
I added a small twine bow with a little bit of bling in the centre.


No comments:
Post a Comment