Tuesday, April 22, 2014

Kaisercraft Telegraph Road Collection

Hello, I am back from holidays and ready to show you a layout I did just before I went away using the awesome Kaisercraft 'Telegraph Road' Collection. Its such an awesome range to play with. I will be showing more layouts/cards once I am back in the swing of scrapbooking again (which will be right after this post.... unpacking can wait!!!)


I used an old photo of my oldest girl when we went for a walk. I just love this photo and that you can scrap it with soooo many different titles.


The sticker sheet that comes with the range is very romantic, but by choosing the purpose of life one, cutting it up and adding the days of the week (also part of sticker set) I had an awesome title for my layout.


I layered 3 papers around my photo (something I don't normally do anymore), distress them and stuck them under my photo. I LOVE using the pink bling flower. I have used them on a few layouts and love the extra wow factor it brings (head HERE to see all the colours)

The background was awesome enough so I only added a little bit of stencil and rubbed a bit of the background off, manly to go with a farmy layout.
If you are wanting to play with this awesome range head HERE and get it while you can.
Thanks for looking
Belinda
Photobucket
Pin It Now!

Monday, April 21, 2014

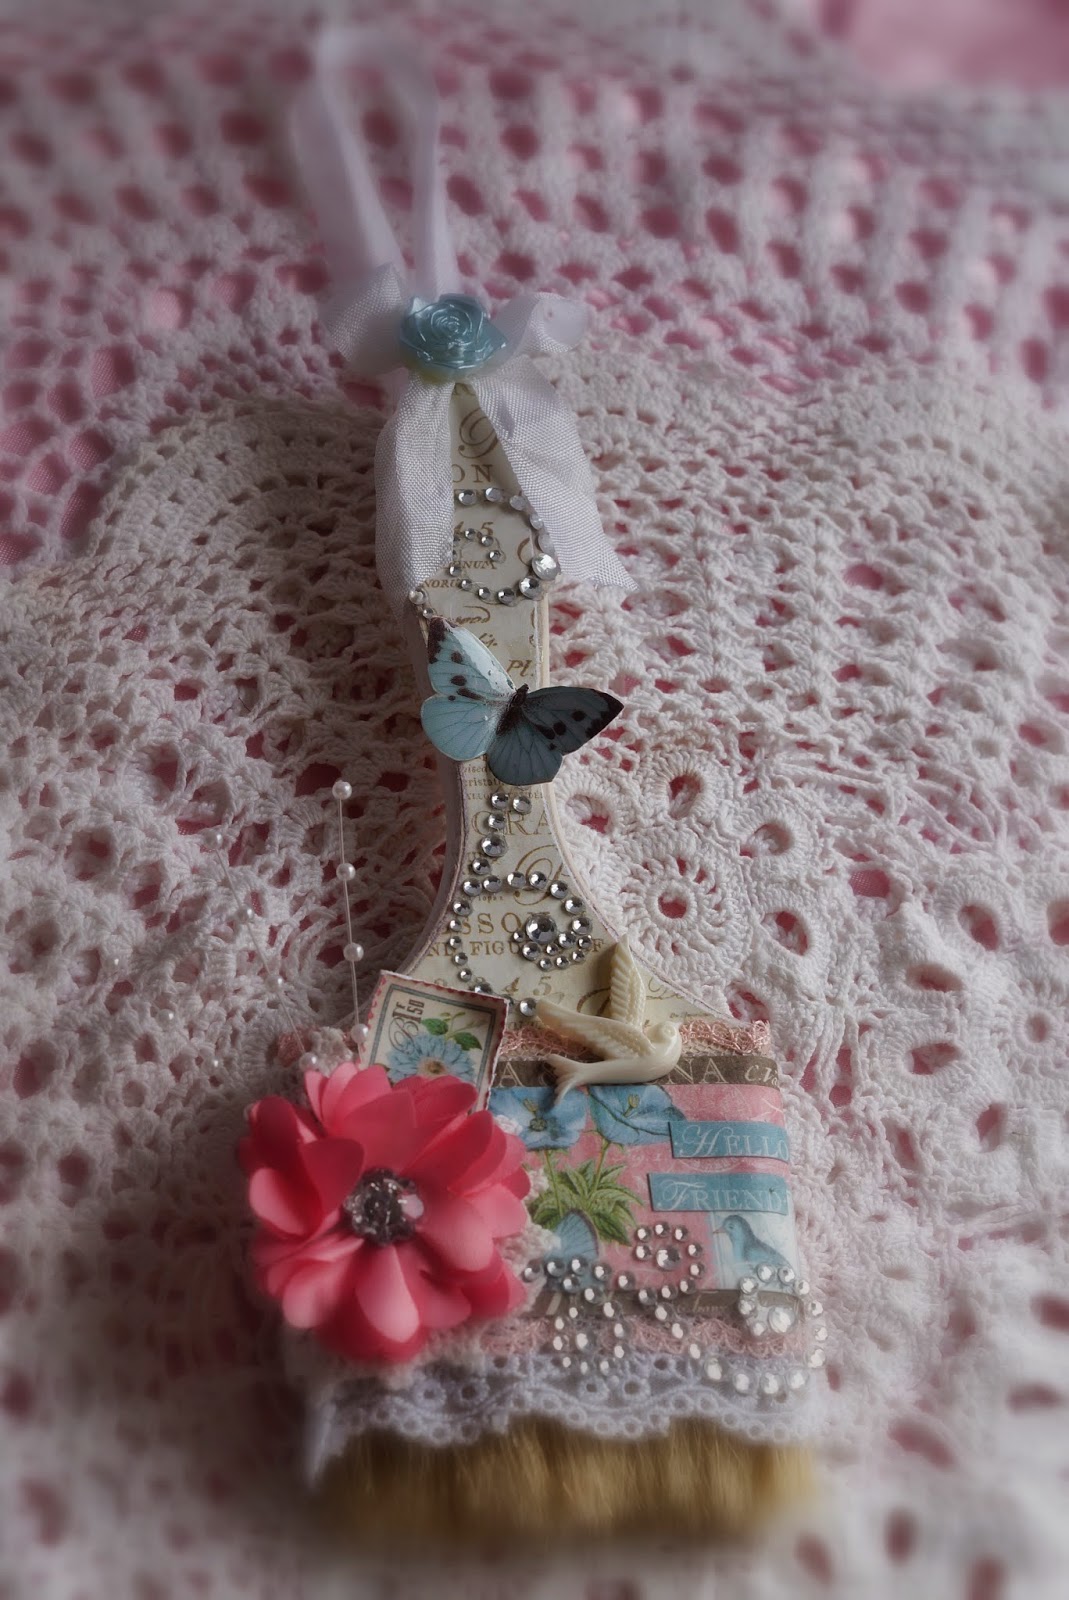
Altered Paintbrush and Mousetraps

Hey guys I am back again....how was your Easter? I hope you all didn't overindulge too much!!

Today I am back with a couple of really quick projects.  Yes I am still using the Botanical Tea papers from Graphic 45, But I thought with Mothers Day coming up this could make some really unique gift ideas.

First I have for you a couple of Altered Mousetraps that I have turned into Shabby Chic fridge magnets.....

I completely pulled the mousetraps apart and gave them a couple of coats of gesso.


Then I set about covering them with just some leftovers and some scraps from my previous projects and on each of them I have used some of the 2.5cm Curly Roses. As they are so small they were completed really quickly.  Which meant I could move onto altering this paintbrush.


I managed to find some paintbrushes that come with raw wooden handles....the only downside of them is that the largest size I can get is 3inches, but that is not too bad as I have found that I can get a lot onto that small piece of real estate!!


I have used satin flowers, a piece of an old doily, lace, some scraps from the Botanical Tea - "Fauna" which I layered with "Sweet Chamomile"


 I have added an Elise Satin Bloom to a piece from an old cotton doily.
 I fussy cut a butterfly from the papers and added a thin coat of glossy accents for durability.

 The final touches were some snippets of bling from my stash, a seam binding hanger and one of those gorgeous resin birds.


Here is the finished project....something a little different and avery unique gift giving idea... 


Well I hope you have enjoyed my  Mad About Scrappin share for this week...
Thanks for stopping by.....

.....till next time 
.....✿ღ.~♥  Live your Bliss ♥~ღ.✿
Photobucket
Pin It Now!

Saturday, April 19, 2014

My lil Cheeky Boy layout - Crece

Hi everyone, Crece here... hope you are having a wonderful Easter with family and friends. 
Today I am sharing with you a couple of layouts. First layout I created using Echo Park 'Summer Bliss' that i got from the last sale from Mad about Scrappin.
 I love the bright colours in this range and the patterns are fab.

'My lil Cheeky Boy'
 This is my Lil Fletch, dressed as a clown. Summer Bliss has fun bright colours and thought this photo of him dreseds up for a special day of school when he was in grade one was perfect.

here is a close up...
here are the papers and sticker from the collection I used


I thought I would share a step by step on how to create the background I have made on the layout too...

Tissue paper and Mist background Tutorial
Cut card to size you want to use as your back ground.

 Using Gesso cover card all over

Scrunch white tissue paper into a ball 

 Open tissue paper up

 Drizzle glue onto card and spread over card using brush.

 Place tissue paper over card and press down  and Trim/tuck edges underneath

 Choose colour mists you wish to use (I have used 3)

Spray the first colour randomly          Spray the second colour randomly

and then the third...dont worry if you have white areas...

next grab a 'baby wipe' (i use these alot) and gently rub all over the tissue paper background, this helps to bled the mist colours together and gets rid of the white patches...

let dry naturally or if you cant wait (like me) gently back and forth use a heat gun over the background. 
Once dry you are ready to create :)


The final layout i would love to share is my Sketch layout I created for this months challenge...
April Sketch Challenge

P.S. I Love You
 I loved using the Fancy Pants paper range 'Be Loved' the colours were soft and great to work with.
This is a photo of my hubby DT and I.

I also added a little secret journaling tag - not that it has much in the way of journaling...I just used the lyrics to one of my favourite Beatles Songs 'P.S. I Love You' 

and a close up of my little cluster...
There is still plenty of time to get your sketch challenge entries in.
Cant wait to see what you have been creating xxx

Crece
xxx


Photobucket
Pin It Now!