Wednesday, July 16, 2014

Cuddles - July Sketch Challenge -By Crece T

Hello everyone, Crece here with you today and i'm sharing with you the layout I created for the July Sketch challenge.

Below is the sketch, created by me that is this months challenge - dont forget you have until the end of the month to get your entries in to win a prize.


Cuddles
This is my son Fletcher's cat, Cuddles.

To create this range I have used the papers from Pink Paisley called 'Switchboard'
I loved the colours in this range.

Here are some close ups....

Here you can see the flower cluster I created using some flowers from the Mad about Scrappin online shop.
The Love Flair Button also comes from a pack 'Hello 2014' there are so many different worded flairs in the pack.


Thanks for looking, and dont forget to get your entries in to have a chance at winning this months challenge...Good Luck

xxx


Photobucket
Pin It Now!

Monday, July 14, 2014

Sew Lovely Vintage Mini Sewing Box

Heya all....It's Mad About Scrappin Monday again and I have a really cute vintage mini sewing box to share with you all.  I received my latest design team kit from Leanne this week and O M G!!! You guys!! this kit was awesome!! It was jam packed with so many goodies I was gobsmacked!! I have to give a big THANK YOU to Leanne she really spoiled me.  Anyways..... One of the paper pads were Sew Lovely from Papermania.  I saw this and of course immediately thought sewing box!! Then my mind started racing and I thought ...."oooooo what if I could create a miniature version of the vintage sewing boxes????" and guess what?? I did!!!!!

I used a couple of Redhead matchboxes that look something like this....
...and they measure 2"x2 1/2" or 5cmx7cm

Then from some thin chipboard I created the base box.  I have some pics of the process, but not a lot.  I got busy with creating and making that I forgot to stop and the "during" pics.  But here is what I do have... 


 Here it is in it's raw or naked form...
 ....and here I am playing around with some hinges 
 Sorry guys this is where the process pics jump ahead and I have a few pics of me creating the handle from some popsicle sticks and a piece from a wooden skewer.  As you can see I have already begun covering the boxes.  I should let you know too, that I pulled the outer cover of the matchbox apart so that it creates a lid of sorts.


 I perfected my hinges and then cut them from some thick cardboard and covered them with some of the tape measure print from the collection.

 Here it is all finished and I am just trying out the hinges and making sure that they all move freely.


                                       and here are her Glamour shots!!


 TO embellish the "lids" or top of the boxes I have used a selection of paper roses, a metal bird charm, some sewing themed buttons and I have printed the words "Sew Lovely" on to some fabric.
 I have filled the insides with bits n pieces from my sewing supplies


I am really happy with how this turned out and to top it off it works...it is functional and all parts move!!! I hope you have enjoyed my little Vintage Sewing box as much as I have.  Thanks so much for stopping by.  Please be sure to check out Mad About Scrappin on all the links below:-

Thanks for stopping by.....


Photobucket
Pin It Now!

Friday, July 11, 2014

Creative Inspiration - Week 28


Welcome again.

I would like to share with you this week a new kit that I have been sent out to play with 
from Mad About Scrappin.

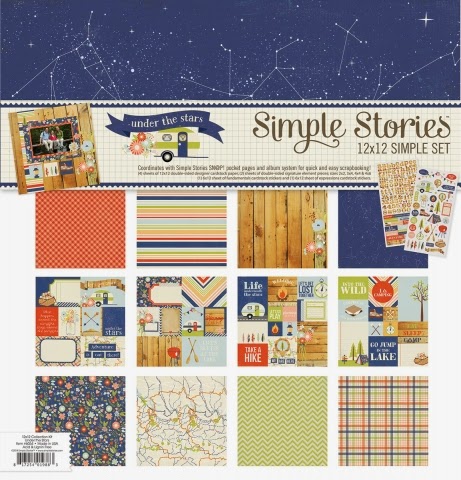
This week I have started to play around with this simple set by Echo Park called Under that Stars.

So here's what I have created for you this week.
I quite like this range.. but then I have loved all the Echo Park ranges lately. This one however I liked as I knew it would provide me with a bit of a challenge. Being that the kit has a camping theme I knew it would be a little harder to be universal in uses. 

However.. as you will see over the next few weeks that isn't the case at all. 

Once again I have played around with a little kraft paper bag to add some texture to my page. I have also used a kraft pocket card as the base of my title and then  added a mixture of a wooden word and some alpha stickers to finish the title off.

Now.. we all have those horrid rub ons laying around that just fall apart when you try to use them.. well for this layout Have used them to add a bit of a feature to my layout. I am not fussed that part of the rub on has not transferred as it has added a bit of a messy look to the page that I wanted. 

To finish off the layout I have added some Studio Calico embellishments and some mini alphas to add the date to the layout. 

I must say that I am once again finding another Echo Park paper range quite versatile. 

I cannot wait to share with you what else I have created using this range.

Till next week.

TFL, Michelle x

Photobucket
Pin It Now!