
Often I create a digital
page when I am planning a Hybrid project.
That way I can nut out the design,
resize or re-colour the digital embellishments to my liking.
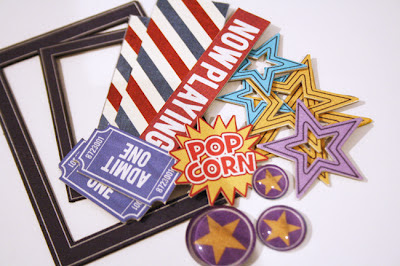
Here is the
digi page which forms the starting block for the Hybrid/traditional
design.

For the next few steps you will need some basic understanding of Photoshop/Elements to proceed.

Now that I have the overall design
sorted I pick up each digi element by engaging the grab tool and then cluster
them together in the work space. Then click on each one in the layers palette
whilst depressing the shift key so all 3 star layers are highlighted then
rightclick. This will show a drop down dialogue box from which you select the
Merge Layers option.

Now isolate the
cluster of star embellishments by dragging the Marquee Tool around them forming
a marching ant border. Click Edit / Cut / File / New / Blank File / from the
drop down dialogue box set the dpi to 300 then click OK/ Edit / Paste. From the
Task Bar click File/ 'Save As' a .jpeg file onto your desktop ready for optimum
printing.

Now open Microsoft Word
and from the task bar select Insert / Picture / From File...and from the desktop
engage the cluster embellishments to drop them in the
document.

Before printing your
document ensure that the printer setting are changed to the highest resolution,
the colour mode is set to CMYK for optimum colour clarity and the right media is
chosen, ie: transparency, plain or photo paper , of course that all depends on
what you want to achieve. Click okay and print away.

So now you have your printed digital embellishments ready
to customise for your project.
Customising printable digital elements.Step 1:

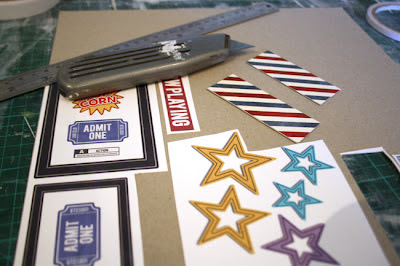
Print the embellishments on
paper that is no less than 80gsm for extra rigidity.
Step 2:

Step 2:

Trim the printed
embellishments then line the back with double sided tape, ready to be adhered to
cardstock or cardboard.
Step 3:
Step 3:

Once adhered on cardboard,
carefully cut the printed embellishments from the sheet.
Step 4:

Step 4:

Customising the ticket
embellishment by hole punching the corners for a more realistic looking ticket
stub.
Step 5:
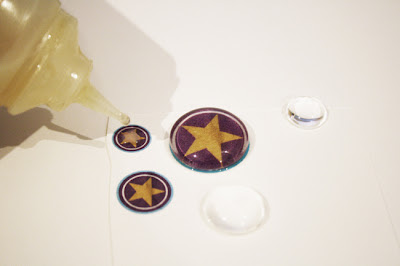
Step 5:

Adhere glass cabachons to
the printed stars using dimensional magic.
Set aside to dry then carefully cut them out using some small detail scissors for precision cutting.
Step 6:
Set aside to dry then carefully cut them out using some small detail scissors for precision cutting.
Step 6:

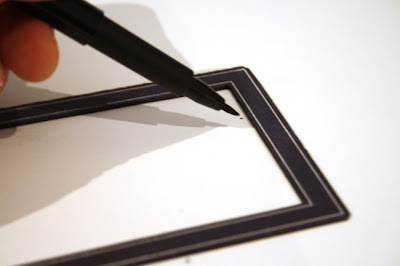
Using your copics or artist
pen carefully colour the cut edges to hide the cardboard mount.
This helps create a more finished look.
Step 7:
This helps create a more finished look.
Step 7:

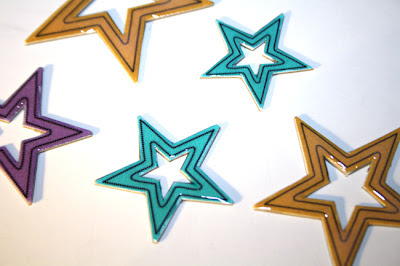
Since you have the
dimensional magic out, why not use it to add a glossy layer
and extra dimension to the star embellishments.
Step 8:
and extra dimension to the star embellishments.
Step 8:

Finally all your digital
elements have been customised into unique embellishments
ready to incorporate into your hybrid projects.
ready to incorporate into your hybrid projects.

I hope you enjoyed the Tutorial and that it inspires you with this months challenge!
Emma Stafrace


