Friday, October 31, 2014

Creative Inspiration - Week 44


Happy Halloween everyone.

I have been quite busy here lately getting my scrap on.

This week I am back to share with you a layout I have created using some more of this yummy paper range on behalf of Mad About Scrappin.

So here's this weeks share.

Hehehe and looking at the layout now they base colours on it really kinda do have a bit of a Halloween feel with the burnt yellow and bold black I have used on this layout to give it a bit of pop.

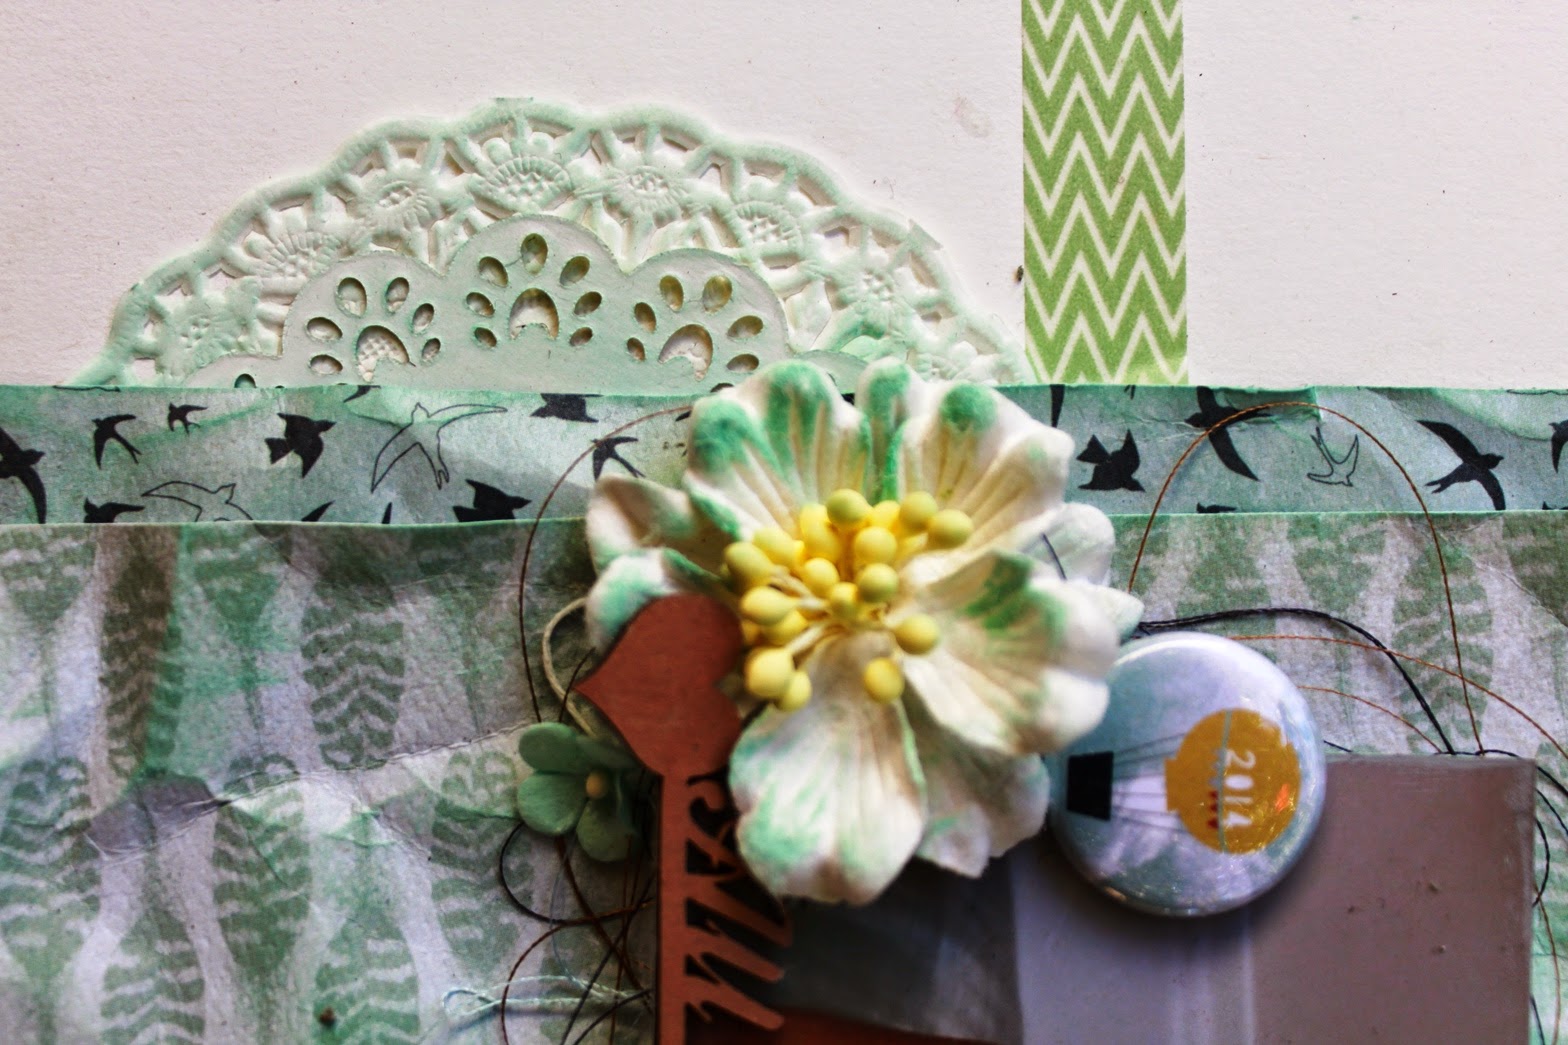
I love the feel of this layout as much as the look. That's because I have used some texture paste and a masking template on the base vanilla card stock before hitting the whole thing with a list mist of some glimmer mists in yellows, greens and tan. It has a slight shimmer to it and I blotted it before it was completely dry to show the dot through. I have also hand stitched on this layout too for a bit of texture. I felt it was fitting as I had created a quilt type effect with the patterned paper. I love these die cut frames. Remember too that they don't have to stay the colours they come.. well they rarely do in my house as I tend to mix them up to match what I am working with.

I have finished off the layout by creating my title with a mixture of a laser cut chipboard word and then added some alphas to mix it up. I have then journal using some Kaiser mini alphas to tie it all together. Super fun and I must admit to have made just a little bit of a mess on my desk whilst I played too. 

Better go and clean it up. 

Till next week. 

Get creative.

TFL, Michelle x

Photobucket
Pin It Now!

Monday, October 27, 2014

Halloween Gift Set

Hey everyone thanks for joining me again and welcome to my Mad About Scrappin Monday project share!! This week I wanted to share with you all a gift set...or maybe gift giving ideas.  I have used Graphic 45's "An Eerie Tale" that I received in a previous Mad About Scrappin kit.  I love these papers...they are not so spooky and the lovely rose prints make them chic and elegant.


I have altered a small kraft paper gift bag with the papers and embellished it with some paper roses, ribbons, lace and a couple of black feathers from my last kit.  I added a seam binding bow to the handles.


 The little pillow box was created from the cut out that is on the inside cover of the 8x8 paper pad.  I have used the same embellishments as the paper bag and added a little lace in one corner to create a little hanger.  


Last, but not least, is the card.  I have used black cardstock as my base and also to mat the different layers.  I used a border punch to add the lacey accent.  


The leaves and pine branches were also paper punches.


I have also matted the inside of the card and added a rubon border from my stash.


Well guys that's it from me today, another short but sweet post.  Please be sure to check out the links below to see what my other creative team mates have to inspire you all....


As always thanks for stopping by.  I sure do enjoy your company and till next time.

....remember to live your bliss......
✿ღ.~♥  Much Love ♥~ღ.✿

Photobucket
Pin It Now!

Saturday, October 25, 2014

bel here.....

hello scrappers, hope you have managed to get a little scrapping done over the weekend so far. 
i havent!! lol 
but i made this page at the begining of the month to show you.
i got sent a gorgeous dt pack so everything you see on my pages are all available from 
mad about scrappin

here is my page

now some close up of the embellishments. 


rememeber everything you see (except the cotton behind the photo) is available from the store.
the paper is authentique - harmony
i hope you have like what you see and please dont forget to enter in this months challenge


Photobucket
Pin It Now!

Friday, October 24, 2014

Creative Inspiration - Week 43


Hello everyone.

Welcome back to another week of creative fun.

I have received a bucket load of goodies from Mad About Scrappin that I cannot wait to share with you over the next few weeks.

This week I am sharing with you a some cards that I have created using some of this paper range.

Now I have used this paper range before however this time around I have created layouts and cards that all look so different. These are the cards that I have created to share with you this week..

As this is a mad crazy couple of months for birthdays I have decided to get on top of them and create the cards in advance. The birthday round start with cards for children so I have created some fun cards.

This card has been created for a good friends daughter. She is turning eight and a really bright and bubbly girl. I have loved watching her grow up over the past five years. I love creating cards for her as I know that they will be cherish. For this card I have stamped onto the base patterned paper. I have then cut out circles onto a matching piece of paper in the range and then mounted it centred using 3D foam tape to give it dimension. I have then used some more matching paper in the range to create the "flowers" and added some matching buttons from my stash for interest. I then added my greeting by adhering mini alphas to a strip of acetate and then adhering it to the card. 
The greeting ends up having a floating look.

The second card is for my son who is turning 11.
(Happy Birthday Nate.. xxx)
He loves homemade cards and I love creating fun ones for him every year. I love that he still likes to get them too and is eager to see what I have created. I have kept it more of a messy look. As I found the aqua dot too bold I have brushed some acetate with white gesso randomly and mounted in on top of the aqua paper. It tones it down. I have then added some washi tape that matched, some ticket stubs and some cork chevrons and an arrow. I have added the greeting with a mix of larger alphas and mini alphas in the centre of the wood veneer mini frame.

I have had fun creating some cards this week.

Better get scrappin.

Till next week.

TFL, Michelle xxx

Photobucket
Pin It Now!

Monday, October 20, 2014

Monthly Challenge - Because I'm Happy

Good morning everyone, I am back with a second  take on the Mad About Scrappin Monthly challenge.  This month our challenge is ....

Would love to see your take on this.  

Anyways without any further ado here is my second layout.  This time I have chosen a more recent song title.... Because I'm Happy - by Pharrell Williams. Lately I have been experimenting with more mixed media techniques and adding stamping to my backgrounds and also adding random embellishments from mixed collections.  In this layout I have used various tags, journalling spots and embellishments from my stash.  I love how this style of scrapbooking is fantastic for using up your stash!!!
 I have used a mix of papers from some of my past Creative team kits.  The base page is one from the Pink Paislee Collection Cottage Farms Collection.  I have added some stamping and using Lindy's stamp gang sprays I have splattered the background.  I also added some texture paste which I sprayed and then quickly wiped off so that there were some white patches.
 To create my title I have used various alphabet stickers from my stash and my strips are just leftovers from The Sweetest Thing collection by My Minds Eye.  The embellishments are just random bits n pieces from my stash and leftovers from various creative team kits.  I have hidden some journalling away in one of the little bags that were in this months kit....I just love these bags!!! I think I have just about covered everything....here are some more pics on all the details and embellishments I used.  You can even see a little bit of the crackle stamp I used!! 


 Well guys that is yet another quick post it from me for this week,.  I do hope you have enjoyed my second take on this month's challenge and I look forward to seeing what you all create for this.  Remember it doesn't have to be a layout...it could be a card, a tag or maybe an off the page project!! 

See you all next week.
Photobucket
Pin It Now!

Friday, October 17, 2014

Creative Inspiration - Week 42


OMG!!! where are the weeks going. Saw on Facebook this morning that there are only 10 more Fridays till Christmas!!!
 NO!!! I am not ready it just cannot be near that time of the year already!!!

Anyways.. just a quick post this week as I have to admit I have whipped this up at the VERY last minute. I have not had a spare day at all this week to scrap and I must admit to feeling very scrap deprived. I am hopping to be able to get some scrap work done this weekend.. Fingers crossed.

So I still have a little teenie bit of this kit left.

I managed to squeeze out a card in preparation for my eldest daughters birthday
 on the 27th of October.
 SSSSHHHH !!! 
She is going to be 17 and I am still very shocked that she is already that age.

So here's her card.

I have used some recycled card as the base for the card cut to my fav card size of 5'x5'. I love this foil paper too. As my daughter is not a girlie girl I thought that this paper range worked perfect for what I had in mind when creating this. I have stamped the tan dot patterned paper randomly then added a fabric heart I had in my stash that Leanne from Mad About Scrappin had sent me ages ago and I had had a chance to play with yet. I lightly stamped the heart with a graph stamp. 

 I then layered some black punched card stock, some lace, a metal embellishment and the number chipboard all goodies I have grabbed at several Mad About Scrappin sales. I then finished off my greeting by adding some alpha stickers.

 Now this was a super quick card cause I was very very time poor however I am most happy with the end results.

Remember.. you don't have to spend a lot of time to get creative.

Till next weeks share.

TFL, Michelle x


Photobucket
Pin It Now!

Monday, October 13, 2014

My Upcycled Book Cover

Hey everyone thanks for joining me again and welcome to my Mad About Scrappin Monday project share!! This week I wanted to share with you all an expandable file folder I created by upcycling an old hard cover book and some old manilla folders I have in my stash and the Madame Payraud collection from Papermania.


Now lets see where to begin a bit of a walk through for you all.  I began by re-inforcing the book spine with some corrugated cardboard.  Sorry guys forgot to take a pic of that step.  I then covered the book with the Madame Payraud papers.  

 Out of some old manilla file folders I created the concertina sides.....

I then attached the inside dividers so that it resembles the pic down below


 Once all my dividers were attached I then adhered the inner file to the book covers with some extra strong doublesided tape
 OOOO I almost forgot that I glued down some seam binding to make a closure for the file folder
 The pic below shows how I attached the files.....
 and vwala!! all done!! I now have somewhere safe to store all my diecut words and embellishments !!!!
 Below is a side on view of the concertina sides.

 This is "her" before her makeover ;)


 and this is after adding all the gorgeous embellishments that Leanne included in my DT kit.


I have to admit I am delighted with how this turned out.  Please be sure to check out the Mad About Scrappin store to see the latest range of embellishments and papers..... AANNNNDDD have you had a go at this months challenge yet?


Don't forget to give this a go and share your projects with us.


Photobucket
Pin It Now!