Monday, July 28, 2014

Some Sew Lovely Cards

"Sewwwww" guys I have been have a wonderful time with Papermania's "Sew Lovley" papers that I thought I would see how far I could stretch them.  Today for my Mad About Scrappin share I have created 4 different cards from some of the scraps leftover from last weeks mini album.

The first two cards I created I have used some pearlised card bases from my stash and layered them with some of the leftovers.  I have used the Elise Satin Blooms in cream  and some of the lovely vintage lace from one of my previous kits.  I have added bling, buttons and twine from my stash.


 For the next two cards I have used some more of the larger Kraft card bases and one of the last full sheets I had leftover....which is not very many!!!  I have fussy cut the cotton reels, bird and button. I add some to one of the tape measure prints and topped it all of with another one of the Elise Satin blooms and  chipboard heart from my kit.  I have kept in with the sewing theme with a printed sentiment.


My next card actually turned out to be a little love themed and it was quite by accident.  I think this will make the perfect Valentines card.  Again I have printed off a sewing themed sentiment and topped the patterned paper with some paper flowers, Elise Satin Bloom, lace and a raw chipboard heart.  I added a little bakers twine bow and couple of buttons from my stash.


Oh My Gosh guys that was quick!!! I am all done!! I hope you have enjoyed my project share for this week.  Please be sure to check back next week as I create a layout using a lot of the scraps left over from this versatile collection.

Don't forget to check out all the Mad About Scrappin links below where you will find a fantastic selection scrapbooking and papercrafting supplies.


Thanks for stopping by.....
Photobucket
Pin It Now!

Friday, July 25, 2014

Creative Inspiration - Week 30


Welcome back to another week of sharing.

I hope that you all have been able to get creative lately.

I have been having some fun again this week creating a layout to share with you on behalf of 
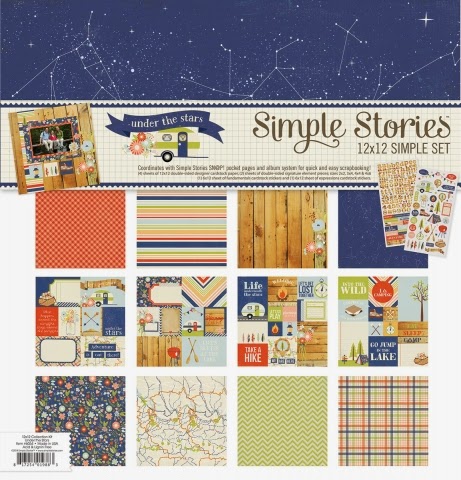
Mad About Scrappin using the Under the Stars kit by Simple Stories again.

So here's this weeks share...

Have had a chance to play around with my camera a little this month with family being all together for part of the school holidays here in Adelaide. 
I love getting candid photos just as much as getting the perfect photo. 
This layout I have created this week showcases a few candid photos I took. 

I have kept this layout fairly simple because I wanted the photos to be able to tell the story. I also decided to just use a few of the colours of this kit for this layout. I find that by doing this it helps me to use up the kit and look at it from a different perspective. This layout I have teamed the navy blue, white and lime green with some plain kraft card stock. 

Once again I have played around with a little kraft paper bag to add some feature to this layout. By teaming it with the lime green and a white tag it has tied it all to the base layout but created a few layers for texture. 
I have also added some of my favourite Studio Calico cork shaped camera using 3D foam tape to mount them. 
Now.. I have also used some Studio Calico wood grain enamel dots for the first time. I have used a similar product a few years ago and I loved them them... I can say that I am a fan of these too. 
They are super easy to use and add that little extra without being too dimensional.

I love this kit too as some of the journal cards in the pack make perfect embellishments. I have tucked on behind this photo and then added my title to it using a mix of larger  and smaller alpha stickers. 
I then finished it off with a Studio Calico cork board arrow... 
Note to self... order more!!! 
They are so much fun to add to layout.

Have you capture some fun moments lately ??

Why not have a play with your camera and see what you get.

Till next weeks share.

TFL, Michelle x

Photobucket
Pin It Now!

Monday, July 21, 2014

"Sew Lovely" Mini Album

G'day everyone...hope you all had (or are having) a crafty weekend.  It is Monday down here in Australia and it is absolutely freezing in my neck of the woods....PERFECT weather for crafting.  Today I have my Mad About Scrappin project share for you all.  I have been working with the "Sew Lovely" papers from Papermania and this week I created a cute wee little mini album.  I have had such a blast creating sewing themed projects...I used to sew alot once, but that was before my paper obsession!!

I have used my Silhouette Cameo and some cut files from the Studio.  I ended up doing away with one of the pages and just going with 5.

.....and here it is!!  I have used a Chipboard Mini word, which I have inked up with some white Versamagic. The paper roses are from previous kits and the buttons and pins are from my stash.
 The lovely vintage looking lace that I have used throughout are also from my kit.  The mini is only small - measuring 3" wide and the last page is 7 1/2" long. I wanted my page edges to stand out a little more than they were, so I painted the chipboard with some gesso and added some "faux" stitching with a black gel pen.    


 For this page, I created a belly band of sorts, to tuck the photo mat under and embellished with an acrylic heart and a very small journaling tag.
 I have used the Tim Holtz "Sewing Room" Die to create my cotton spools with and cut some photo mats using my Nestabilities dies.
Here you can see I have used some more of those gorgeous little paper roses and some of the white Flower Bead Trim
 Here I created a pocket using 2 doilies folded in half to create a pocket and added some strips from the papers.  I added a simple photo mat tag and topped it with some of the vintage lace from my kit and a button.
 Here I have used one of the little vellum bags I had received in a previous kit.  I slipped a little button topped tag for journaling inside and tucked a couple more photo tags behind it
So there it is guys, my "Sew Lovely" wee little mini album.  I plan to fill this with some random pictures of our family, friends and pets.  

Please be sure to check out all the latest stock that Leanne has over in the store. Lots of new stuff has been arriving. 

Mad About Scrappin Facebook

Thanks for stopping by.....

.....till next time 
.....✿ღ.~♥  Much Love ♥~ღ.✿
Photobucket
Pin It Now!

Saturday, July 19, 2014

Hello Beautiful, featuring Pink Paisley.

Hello, Crece with you today with a product spotlight...
Today Im sharing a layout I created using a Pink Paisley range called 'Switchboard'.

Pink Paislee Switchboard, 6x6 Petite Paper Pack

I loved the soft colours in this range.

Hello Beautiful
This is my neice Mia - she is such a cutie!
I matted every layer with Black cardstock to make it pop.
The small white bags are great to use for a place to hide some journaling on a tag!

and a close up...


Here I have used Evalicious 'Hello' Flair button surrounded by some coordinating flowers.
I have cut the black dial from one of the papers in the range.

Thanks for looking

Crece
xxx


Photobucket
Pin It Now!

Friday, July 18, 2014

Creative Inspiration - Week 29


Back this week to share with you something a little different I have created using the Under the Stars - Echo Park paper range.

So this week I have created a few cards to inspire you. I must say it was a little challenging to create them with a house full of kids as it was school holidays and the word "MUUUMMMM" seems to be a constant every time I sit down to create. So I managed to get these done to share with you.

I have to say that I did find it a little challenging to create these cards using this paper range. However I persisted and am quite happy with the bold results.

For the first card I have kept it simple. Mixing it up with a kraft die cut card and some of the matching Echo Park stickers. I have created a bit of dimension in this card by adhering my title  and the bunting using 3D foam. I have also added a bit of washi to add that little extra. 

For the second card I had this bold lime ribbon that I had got in a mixed embellishment pack from a Mad About Scrappin sale that matched perfectly with this range. I also added a plastic doily and some floral stickers using 3D foam from my stash to finish off this card.

Sometimes finding time to scrap may be a challenge.. however if you keep it simple you will find that you can get something done real quick.

Till next week.

TFL, Michelle x
Photobucket
Pin It Now!

Wednesday, July 16, 2014

Cuddles - July Sketch Challenge -By Crece T

Hello everyone, Crece here with you today and i'm sharing with you the layout I created for the July Sketch challenge.

Below is the sketch, created by me that is this months challenge - dont forget you have until the end of the month to get your entries in to win a prize.


Cuddles
This is my son Fletcher's cat, Cuddles.

To create this range I have used the papers from Pink Paisley called 'Switchboard'
I loved the colours in this range.

Here are some close ups....

Here you can see the flower cluster I created using some flowers from the Mad about Scrappin online shop.
The Love Flair Button also comes from a pack 'Hello 2014' there are so many different worded flairs in the pack.


Thanks for looking, and dont forget to get your entries in to have a chance at winning this months challenge...Good Luck

xxx


Photobucket
Pin It Now!

Monday, July 14, 2014

Sew Lovely Vintage Mini Sewing Box

Heya all....It's Mad About Scrappin Monday again and I have a really cute vintage mini sewing box to share with you all.  I received my latest design team kit from Leanne this week and O M G!!! You guys!! this kit was awesome!! It was jam packed with so many goodies I was gobsmacked!! I have to give a big THANK YOU to Leanne she really spoiled me.  Anyways..... One of the paper pads were Sew Lovely from Papermania.  I saw this and of course immediately thought sewing box!! Then my mind started racing and I thought ...."oooooo what if I could create a miniature version of the vintage sewing boxes????" and guess what?? I did!!!!!

I used a couple of Redhead matchboxes that look something like this....
...and they measure 2"x2 1/2" or 5cmx7cm

Then from some thin chipboard I created the base box.  I have some pics of the process, but not a lot.  I got busy with creating and making that I forgot to stop and the "during" pics.  But here is what I do have... 


 Here it is in it's raw or naked form...
 ....and here I am playing around with some hinges 
 Sorry guys this is where the process pics jump ahead and I have a few pics of me creating the handle from some popsicle sticks and a piece from a wooden skewer.  As you can see I have already begun covering the boxes.  I should let you know too, that I pulled the outer cover of the matchbox apart so that it creates a lid of sorts.


 I perfected my hinges and then cut them from some thick cardboard and covered them with some of the tape measure print from the collection.

 Here it is all finished and I am just trying out the hinges and making sure that they all move freely.


                                       and here are her Glamour shots!!


 TO embellish the "lids" or top of the boxes I have used a selection of paper roses, a metal bird charm, some sewing themed buttons and I have printed the words "Sew Lovely" on to some fabric.
 I have filled the insides with bits n pieces from my sewing supplies


I am really happy with how this turned out and to top it off it works...it is functional and all parts move!!! I hope you have enjoyed my little Vintage Sewing box as much as I have.  Thanks so much for stopping by.  Please be sure to check out Mad About Scrappin on all the links below:-

Thanks for stopping by.....


Photobucket
Pin It Now!