Saturday, May 30, 2015

Creating with a kit - September Skies Kit


Back to share with you the first of two kits I have worked with on behalf of Mad About Scrappin.

This is the first of the two that I want to show you called September Skies.
This kit includes the following with full instructions for the 3 above layouts:
4 x Heidi Swapp September Skies Pattern Paper
2 x Cardstock (not pictured)
3 x Flair Buttons

1 x Roll of Washi Tape
1m Twine
3 x Set of Journal Cards
Peg
Hot Air Balloon Wood Veneer
Wood Veneer Frame - Shine
Bitty Bag
2 x Peonies 
Magnolia Flower
Wish Chipboard Word
Doily
Wire
Star Sequins

ONLY $15.00 
The first layout was quite a fun layout. I have played around with some fun photos of my girls and one of their good friends at the playground we took last month. I have created with the mixed patterns in this paper range to create pennant flags to embellish this layout. 

The title I have used hand cut the word happy and then mounted it onto some of the matching patterned paper and then hand cut it out again. 
I have also added some hand stitching to add a little detail. However you could do the same with a journal pen should you not enjoy hand stitching on your layout. 

I have then added some interest to the layout using a mix of matching buttons from my stash and one of the flairs from the kit to finish it off. 

I played around with the florals in the next layout. I loved the bolder colours in the floral pages. I have teamed that up with the bolder red orange papers from this kit to add a bit of contrast on the black cardstock. 

Once again I have created my own embellishments for this layout. I have hand cut some stars from the floral paper and then mounted them onto the bolder red orange dot paper. I have adhere them staggered using some 3D foam tape to create dimension. 

I have used a couple of stamped to add some details to a graph journal card from my stash to add a little bit extra to the page. I have then used a office paper clip and jazzed it up with washi tape. 
Super easy and fun to play with. 

The last layout I have played around with the blues and greens from the kit. I have added a journal card to this layout too. Half of the graph journal card has been stamped with a number stamp and the other half I have border punched. These I have then layered with a lined paper bag and added the wood veneer balloon for some interest. 

Once again I have played with another paper clip with washi tape. This I have added to another piece of  graph journal card and finished off with a flair from the kit.

I have finished the layout off with a few touches of washi tape to add a bit of interest. 

All three of these layouts were super easy to create and fun.

Head over to the Mad About Scrappin Facebook Page to grab one! 

Will share the next kit soon.

TFL, Michelle xxx


Photobucket
Pin It Now!

Friday, May 29, 2015

Creative Inspiration - Week 22 2015


Hello... Hello...

Well... with the end of another month comes the last of another paper range to share.

I have very much used up every last teenie little bit of the Princess paper range by Echo Park this month. I loved playing around with this paper range for sure on behalf of Mad About Scrappin.

So here's the layout I have to share.
I have used up the last bit and pieces to create a layout about my daughter recent birthday party. The paper range worked really well with the party photos. The layout has a bit of a different feel to it as well with the "sections" that have been set up with this design. It was also a little different for me to use multiple photos and for the photos to be this small too. 

I really love the tea cup and teapot stickers from the matching sticker set as they tied in with the tea party theme of my daughters party. 

I have also added some stitched detail to the layout. It had added a patch work effect and has added to the whimsical feel to the layout. It was also a perfect way to tie all the little scraps of patterned paper together too. 

The matching stickers in this range as just so cute. I have used one of the stickers, the "girl" pennant flag, as the main part of my title. I have adhered it using some 3D foam tape and finished off the title with some large alpha stickers.  

I have finished off the layout by using the matching stickers in the range. To create a bit of interest, I have adhered them with 3D foam tape.
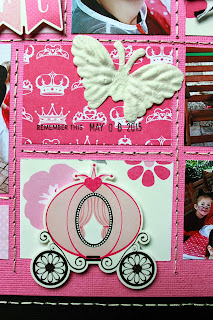
 AND.... I have to admit to not being a sticker person HOWEVER...I love this carriage sticker it is just so cute and the sticker are just perfect in this paper range too..

To finish off the layout I have added in the date the party happened. I love adding in the date on some of my layouts too using a date stamp. I find this the perfect way to document when the events happen too. 

Had a ball playing with the last bits and pieces from this paper range. I am a little sad that this is finished. 

However am looking forward to sharing with you a new paper range to start the next month. 

Well... better get back too getting my scrap work done. 

Thanks for stopping by.

TFL, Michelle x

Photobucket
Pin It Now!

Monday, May 25, 2015

A Layout to share...

Hi all and welcome to my creative inspiration share for Mad About Scrappin.  This week I have a layout that I created from all the scraps from these kits....
 .....and here is what I created.
 As usual readers here are my glamour pics and some close ups on the details/

I have used some Tim Holtz "Black Soot" Distress ink on the edges.  It tied in some of the black elements I have used on the page and it also made the colours pop that little bit more.  
I have also used and edge punch to add some variety to my strips 
and also here on the edge of layouts background.  
 I love these gorgeous pink flowers and they teamed up perfectly with the papers and doily.  I have added a touch of bling with these flourishes from my stash and....

....bye also sprinkling a few of the silver sequins you can see here

This was a super quick layout to do and I just love how versatile these papers are. Well readers, that is it....that's all there is....


  As always thanks for stopping by.  I sure do enjoy your company. Please be sure to check out the links below to see what my other creative team mates have been up to...

....remember to live your bliss......
✿ღ.~♥  Much Love ♥~ღ.✿

Photobucket
Pin It Now!

Friday, May 22, 2015

Creative Inspiration - Week 21 2015


Wow! It's the end of yet another week. 

It all seems to flying by at the moment.

This week I have a very quick layout to share using the Princess -  Echo Park paper range.

Here's this weeks layout.
I have kept it simple this week as I have been super busy.  I have used some kraft card stock as the base for this layout to create a very different feel. 
I decided to work with the bolder pinks of this paper range as the little girl in the photo is rather bright and bubbly. I added a small paper doily to tie in a little white and then printed a digital stamp onto a graph journal card to add some feature to the background. 

I have used a mix of the matching stickers in the range create a bit of a journaling feature down the left side of the photo. Super easy and finished it off with the matching crown which I have adhered using 3D foam tape to add some dimension. 

What I love most about this kit is the cute stickers that match. They work so well to be able to embellish a page quickly. I have used a glittered frame from my stash to the bottom left of the layout which I have added the dress form too. But before I have adhered it I have added a sheer white ribbon bow to add a bit of texture to the layout. 

Super quick and super fun layout to create of a very bubbly giggly little girl I know.

Well back to it.

Till next time I share.

TFL, Michelle x


Photobucket
Pin It Now!

Wednesday, May 20, 2015

Childhood Memories Layout and Card.


Hi, Im back again to share with you all another layout and card l have created with the left overs of the kit l used in my earlier post a fortnight ago, using the MME Jubilee papers. 
First up is the layout l created. l used the MME Bike paper as my background matted up with the left overs from the Jubilee Range. 


I used a punch to give the MME green paper a border around all the sides of the paper. I think it looks pretty doing this. I found this photo of myself when l was a little girl, so l decided to scan it and use on this layout. It works really well with these papers, it has a vintage shabby feel. Thats what l love about these papers. 

In the bottom right hand corner, l used this Gorgeous little wooden Bike Veneer that came in my kit. Which l added some little flowers coming out of the basket on the bike. l also added a touch of scattered sequins too. 


Also in the bottom left hand corner of the layout l made a flower out of the MME Jubilee papers. 
Added with a Butterfly, a coral red rose, a flair and gold sequins. It makes a perfect little Cluster.


I added layers under my photo, using the MME papers, a doily, Chipboard Circles, and a quote. 
In the top left corner of the photo l added a flair, and some flowers, with a touch of glitter and sequins. 
l matted my photo with Foam tape to give it dimension.


Sprinkled over the page l used the Gold Sequins that came in the kit. Also added Kindy Glitz to my flowers to give it a sparkle. 


CARD PROJECT. 


My next Project to share with you all is a card l made out of the left overs in my kit.
l cut a 5 1/2 x 7 inch white card stock. I layered it with the MME papers, l cut them at random sizes. l distressed the edges to give it a shabby vintage feel. 
l used the Gold doily, twine, wash tape, sequins, and a circle quote You and Me, some flowers and also used the little bike quote card. l even used the little wooden peg that l also got in the kit. 


l also added a wooden veener chipboard word as my title. My flowers l added some white Gesso painted over them, to give them a Shabby Chic look. 
Just Love It.! 


That"s it for me this week. Hope you all like what l have created using these Gorgeous papers.

Until Next Time.

Happy Creating, 

Tracey.


Photobucket


Pin It Now!

Monday, May 18, 2015

Botanical Tea Card and gift bag

Hi all and welcome to this weeks Creative inspiration project.  I am still revisiting a previous kit Leanne had sent.  I was pleasantly surprised at just how much of this kit I still had, even after using it to create with last week.  So I thought that whilst I had it out of the hoard vault I would create a gift bag and matching card for my friend as well.

The bag was a plain white one that I had managed to pick up in a cheap craft supply store recently, and the card base is from a previous kit.

 Well readers even after 3 cups of coffee to try to kick start the old grey matter, I really haven't got a great deal to say, these gorgeous glamour shots really do a lot of the talking for me.


I have used up a lot of supplies from my previous kits, and few pieces of bling from my stash.


Well readers, that is is it from me this week.  Thanks for stopping by and as always please click the links below to see what my fellow creative team has to share.  Also be sure to check out what kits are available this month in the store....


✿ღ.~♥  Much Love ♥~ღ.✿
Photobucket
Pin It Now!